 |
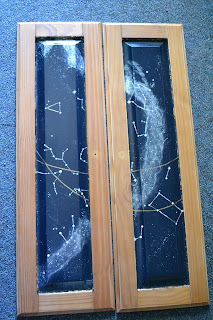
| Small stars in silver & white paint |
All about the details
Where we left off on Part 3, I had just put in the main 'constellations' on the doors. I ended up going back through and started putting in the smaller stars in the Ralph Lauren metallic silver paint and slightly watered down white acrylic paint. I didn't want the star clusters to completely take over the doors so I kept my focus on the 'Milky Way' and did what I could to make it feel like organic placement. Once dried, I used a gold glaze paint to put in the lines that went through both doors along with the inner trim of the panels. Though the right color and feel that I wanted to have, I was just not fully satisfied with how the paint handled. It was too blobby and uneven for my taste. Honestly, it was a rather frustrating issue to have which caused me to step away from the project for a day or 2. I knew that I needed to figure out another solution but if I fussed with it, I knew I would screw up with the project as a whole.
 |
| Refurbishing the original knobs |
Problem Solving
 |
| Un-tapeing the doors |
Now what about the gold lines on the doors? Gold leaf wasn't going to be the answer. Digging around among my supplies, I ended up rediscovering that I had metallic sharpie markers. So using the gold marker to rework the painted gold lines then the silver on some of the constellation stars. I also ended up using a bit of the gold marker on the door knobs for a little added color.
 |
| After 2 layers of clear matte spray paint |
To be continued...
They look stunning, Dawnie!
ReplyDelete