Before the changes
 A few months back, dad had brought home an old wooden box from a job site which was destined to be thrown out. It was in relatively good condition but did need a little work in giving it some new life. Some changes I knew that needed to happen was the handle/knob for the lid needed to be switched out to something a little larger for easier use. The second change was that the label holder on the front of the box needed to be carefully popped off and the rust cleaned off. Beyond that, I was basically going to allow myself to go with the flow and see where it was going to take me.
  Hardware rehab
The original brass knob was easy to take off of the lid, which I set aside to analyze later. The label holder, however, was a little more tricky to do. Going to my dad, I asked him for his opinion on how to approach the task. With his guidance, the label holder was carefully popped off to discover that it had 2 labels jammed into it and had laminated themselves to the metal. With a bit of a clean up with a sharp blade, the paper and glue was removed before I went about to remove the rust from the front side. He did warn me that depending on the level of rust, that there would no longer be the brass patina to salvage so I would have to repaint it. As I carefully worked and removed the rust, I found that it was indeed the case. Luckily I have plenty of different colors of spray paint on hand but that would depend on what I was going to use to replace the knob with.
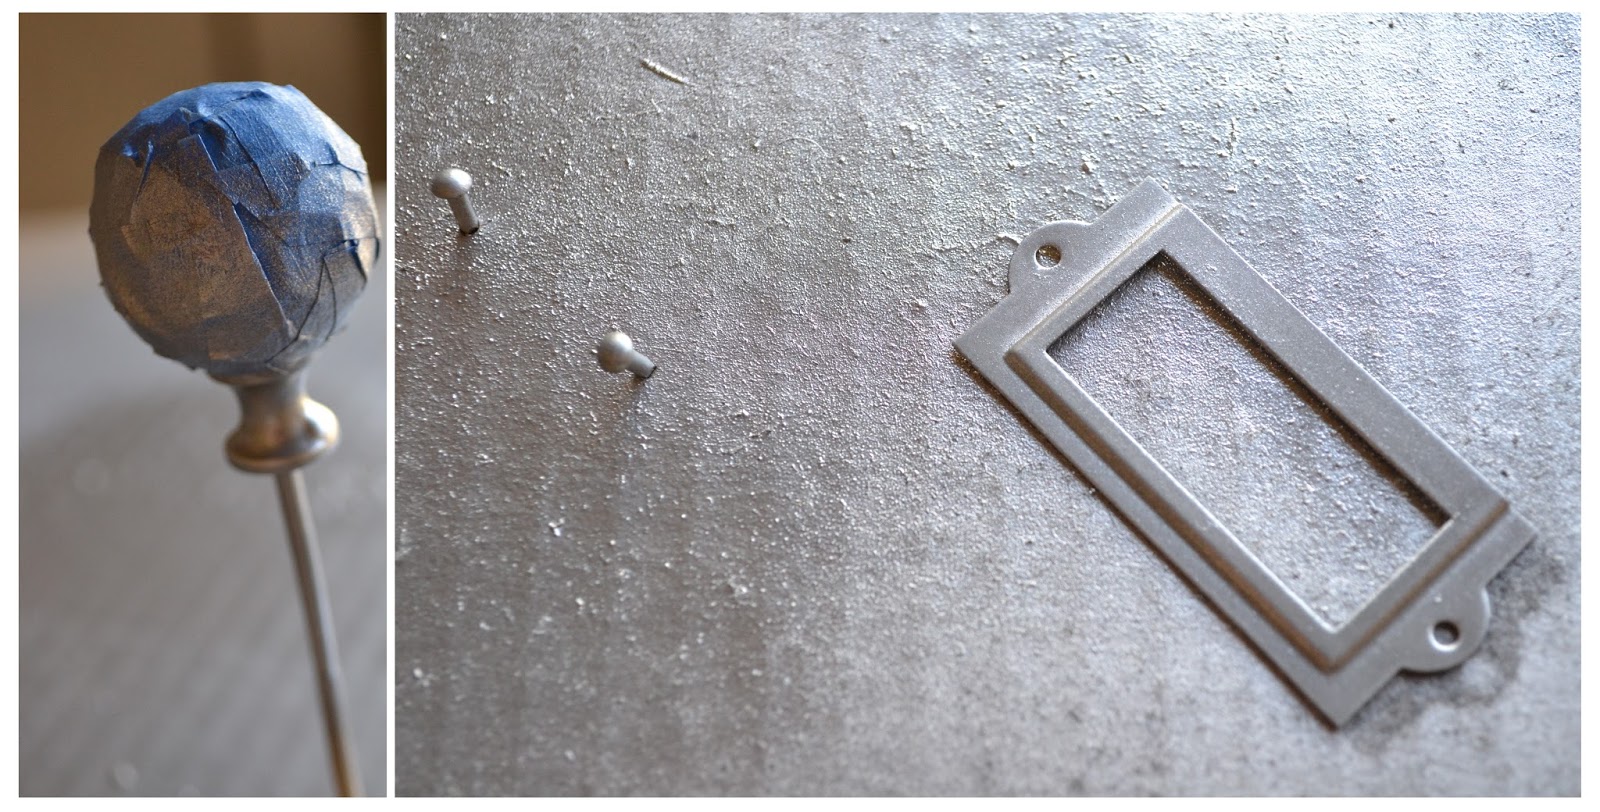 Going through some of my collection of salvaged knob handles that I save for possible uses, I settled on a beautiful cut glass knob that fit with what I wanted. It was bigger then the original so there would be ease of opening and closing the lid but it wasn't so massive that it would be out of scale with the box itself. Masking the glass for the knob so it wouldn't be hit with any over spray. I took the hardware outside and spray everything with a coat of metallic silver spray paint. I rarely use this particular color and the reason why is that unlike most colors, Restolium's Metallic Silver remains tacky to the touch past the 1 hour mark and will not be fully dry until for 24 hours. So it's certainly an exercise in patience when it comes to using this particular paint. If you end up using this paint and need to speed up the drying process, I would suggest to have the items placed out in the sun to help with it.
  Bringing in new life
 I'm not sure why but I decided on going with an insect theme with the lid of the box. Taping off the edge all of the way around, I ended up using a mix of paint, color pencils, and gel pens to create a dragonfly and a scarab beetle. So that there was no 'right way' with how the lid was placed back on the box, I did each in opposite directions. Once done, I did an initial coat of clear glaze spray paint. Having used wood glue and toothpicks, I filled in the holes that the tack nails were originally in so that during the reassembly, they would be able to hold firmly in place. Once the glue was dry, I trimmed the toothpicks as close to the box as I could. Removing the tape from the lid, I sanded the 'trim' I had artificially created and also sanded around the box before giving both a coat of the clear glaze. This causes the lid to have a very subtle texture difference without having too much added to the initial design.

Reassembly
Making sure that the hardware was done with its drying process, I de-taped the knob and got it attached to the lid. Reattaching the label holder proved to be scene of frustration. I found it a bit difficult to hold the tiny tack nails in place long enough tap them into place. After a bit of a struggle and some advice from my dad on how to accomplish my goal, I was able to get the ludicrously small nails into place. Luckily the only thing I needed to fix was to do a bit of paint touch up on the nails. The end result is quite lovely to look at is a perfect holder for small items, jewelry or even random office supplies.
Looks lovely!
ReplyDelete